To create your own textured canvas art, gather an old or new canvas, joint compound, and a few everyday tools like putty knives or even a potato masher—who knew household items could reveal creativity? First, spread joint compound evenly across the canvas, forming textures with different tools. Let it dry completely, and if you're feeling adventurous, pile on more layers once the first layer sets. After that, paint with acrylics, using light colors as a base to enhance depth. Once you've created your masterpiece, you'll find the right spot to display it, and you may just discover even more artistic techniques.
Overview of DIY Textured Art

DIY textured canvas art is often a fun and rewarding way to express your creativity while enhancing your home decor. The beauty of this canvas art DIY approach lies in its affordability and the personal touch you can add, transforming ordinary materials into unique textured canvas wall art. By using common supplies such as joint compound and acrylic paint, along with basic texturizing tools like putty knives and even forks, you can create stunning designs that reflect your individual style.
Additionally, engaging in this creative process fosters exploration of colors and textures, allowing you to fully engage in your artistic journey, as you discover your preferences and techniques through practice DIY canvas art fosters creativity and personal expression.
For beginners, the process of creating DIY textured art is surprisingly forgiving, allowing you to embrace imperfections as part of your artistic journey. You won't need to fret over mistakes; simply adjust your technique, or apply more texture, and watch your creation evolve. This not only fosters skill development in both woodworking and design but also cultivates a sense of accomplishment as you complete each project.
Furthermore, the trend toward textured art encourages resourcefulness, as you can repurpose old canvases or thrifted finds. Imagine giving a long-forgotten piece a vibrant new life, turning it into a striking statement piece that captivates anyone who enters your space.
The possibilities are endless, leaving you with a canvas that's not just art but a reflection of your creativity and ingenuity. So, why not plunge into this engaging world of DIY textured canvas art? You'll not only enhance your living space but also discover a fulfilling creative outlet that may just surprise you.
Essential Materials and Tools

When you're ready to create your textured canvas art, gathering the right materials and tools is key to releasing your creativity.
You'll need essentials like stretched canvas, joint compound, and a base coat of white acrylic paint to set the stage for your masterpiece.
Don't forget the tools—putty knives, brushes, and a spray sealant—because nothing says "I'm an artist" quite like a well-equipped workspace, even if it does look like a paint explosion just occurred!
Required Art Materials
Creating textured canvas art requires a few essential materials and tools to bring your vision to life. You'll need a blank canvas, which can be new or repurposed—after all, who doesn't love a good DIY project? To create the texture, drywall mud or joint compound will be your best friend, typically costing around $8 at hardware stores like Home Depot. For applying and shaping this texture, grab a putty knife and various texturizing tools, such as forks or potato mashers; yes, those kitchen utensils can become your artistic allies.
Acrylic paints in your desired colors will finalize your masterpiece, with creamy white recommended for a softer background. Don't forget to protect your workspace with drop cloths; nobody wants a paint disaster! Finally, consider using leftover interior paint for a cost-effective background color before the real fun of texturing begins.
Here's a handy table summarizing these materials:
| Material | Purpose | Notes |
|---|---|---|
| Blank Canvas | Base for your art | New or repurposed |
| Drywall Mud | Create texture | Available at hardware stores |
| Putty Knife | Apply texture | Essential tool |
| Acrylic Paints | Final design | Choose your favorite colors |
| Drop Cloths | Protect workspace | Avoid paint splatters |
Essential Tools Overview
To achieve stunning textured canvas art, you'll need a selection of essential tools that enhance your creative process. Start with a putty knife, an indispensable companion for smoothly applying joint compound to your canvas.
Pair it with palette knives, which allow you to shape and detail textures, transforming your artwork into a tactile wonderland. Don't shy away from unconventional objects either—potato mashers and combs can create unique patterns that will intrigue and delight.
When it comes to securing your canvas, a heavy-duty staple gun is a must, ensuring that everything stays in place while you work. For precision cuts on your frame, a miter saw is your best friend, delivering sharp angles that scream professionalism.
To maintain clean lines during painting, painter's tape is essential; after all, nobody wants a rogue paint spill ruining their masterpiece. Protecting your workspace is equally important, so lay down drop cloths to catch any errant splashes.
Alternative Texture Options
After gathering your tools, it's time to explore alternative texture options that can enhance your canvas art. Instead of relying solely on joint compound, consider experimenting with wall spackle, modeling paste, or even tile mastic. Each of these materials offers distinct finishes and durability, opening up a world of creative possibilities.
For applying these textures, everyday items like forks, potato mashers, or sponges can become your best friends, transforming a simple canvas into a tactile masterpiece.
If you're looking for a smoother application, mixing joint compound with Elmer's glue can greatly improve adhesion and flexibility, which is essential for preventing unsightly cracks. Imagine the surprise when your artwork not only looks good but stands the test of time!
Adding acrylic paint directly to your texture medium before application allows for uniform color throughout the surface, ensuring your designs pop with vibrant hues.
Don't shy away from layering different textures; multiple applications of varying thicknesses can create a mesmerizing depth that draws viewers in. It's like a secret invitation to explore every nook and cranny of your creation—just be prepared for the compliments that follow!
Steps for Creating Textured Canvas

Now that you've gathered all your materials and tools, it's time to commence the fascinating journey of creating textured canvas art.
You'll want to explore various texture application techniques, making use of everything from putty knives to the unlikely potato masher, as you layer on your joint compound with precision.
Textured wall art isn't only innovative but also allows for personal storytelling through unique textures.
Selecting Materials and Tools
Creating textured canvas art starts with selecting the right materials and tools, which is essential for achieving the desired outcome.
First, you'll need a stretched canvas or canvas panels; these can be thrifted for a bargain or custom-built to suit your artistic vision. That's right—embracing the DIY spirit can add a personal touch that store-bought options simply can't match.
Next, joint compound or drywall mud is your go-to for creating texture. Aim for a thickness of about 1/8 inch; this guarantees that your texture pops without sagging, which would be a bummer, wouldn't it?
For applying and shaping the texture, gather tools like putty knives and palette knives, but don't shy away from using unconventional items like potato mashers. Yes, you read that correctly—potato mashers!
Lastly, you'll want vibrant acrylic paints to bring your masterpiece to life. They allow for smooth color blending while still wet, making shifts effortless.
Don't forget to set up a clean, flat workspace and gather all your materials before diving in; it'll make your creative journey much smoother, and who wouldn't appreciate that?
Happy crafting!
Texture Application Techniques
To kick off your textured canvas art, grab your putty knife and spread the joint compound evenly across the surface, aiming for a thickness of about 1/8 inch—thick enough for visibility but thin enough to avoid sagging.
Now, here comes the fun part: experiment with various tools, like forks, potato mashers, or palette knives, immediately after applying the compound. This is where you can let your creativity run wild, creating unique textures and patterns.
Once you've applied the compound, allow your canvas to dry completely, which might take anywhere from 24 to 48 hours, depending on the humidity and thickness of your application.
Patience is key here; after all, good things come to those who wait.
For those looking to enhance their artistry, consider incorporating layering techniques. Apply additional joint compound to build depth, letting each layer dry before adding the next.
As you texture, use gentle motions—swooping, stamping, and other playful gestures—to improve your creative expression, making it easy to smooth out any mishaps mid-process.
Happy texturing!
Finalizing and Displaying Artwork
After allowing the joint compound to dry thoroughly, it's time to finalize your textured canvas art. First, assess the texture—if it needs a bit more oomph, you can easily add more joint compound for touch-ups.
Once you're satisfied with the surface, grab some acrylic paints. Start with a base layer of white or a light color; this will act as a magical backdrop that enhances depth and detail, making your artwork pop like a freshly opened can of soda.
For a polished finish, consider framing your masterpiece with a simple 1×2 pine frame. Not only does it improve the presentation, but it also protects those delicate edges from the hazards of life—like curious pets or rogue dust bunnies.
When it comes to displaying your artwork, choose a well-lit area that highlights those fabulous textures, but avoid direct sunlight unless you want your colors to fade faster than your enthusiasm for early morning projects.
Techniques for Unique Textures

When it comes to adding unique textures to your canvas art, experimenting with various tools can make a significant difference. You might be surprised at what you can achieve with everyday items. For instance, palette knives and forks can create enchanting lines and shapes, while unconventional tools like potato mashers and combs can produce intricate patterns that catch the eye.
To help you navigate your artistic journey, here's a handy table of tools and their potential effects:
| Tool | Texture Effect | Tip for Use |
|---|---|---|
| Palette Knife | Bold, sweeping strokes | Use varying pressure for depth |
| Fork | Fine, detailed lines | Drag the tines for a sharp effect |
| Potato Masher | Chunky, organic shapes | Press firmly for a pronounced look |
| Comb | Repetitive, rhythmic patterns | Slide it across dried compound |
| Sponge | Soft, blended textures | Dap lightly for subtlety |
Using a thin layer of joint compound—about 1/8 inch thick—will help maintain structure while ensuring your texture remains visible and impactful. Don't hesitate to incorporate found objects, like textured fabrics or sponges, to imprint unique patterns that add depth to your artwork. Experiment with layering multiple textures, allowing each layer to dry completely before adding further details.
And remember, practice on scrap materials before diving into your canvas; it's a great way to refine your approach and boost your confidence. After all, every masterpiece starts with a little trial and error!
Painting and Finishing Your Art

With your textured canvas ready, it's time to bring your creation to life through painting and finishing techniques. Start by selecting vibrant acrylic paints, renowned for their bold hues, and mix them with a small amount of spackle. This combination will yield a smooth, frosting-like consistency that's perfect for texture application.
Once you've laid down a base layer, think about using lighter colors over the dried joint compound, as this won't only add depth but also create a fascinating interplay of shades that draws the eye. To guarantee your artwork remains vibrant over time, remember to avoid direct sunlight and maintain a clean, dry environment proper display conditions that will protect your creation.
To enhance the raised areas of your artwork, implement a dry brushing technique. This method involves using a relatively dry brush to apply paint, allowing it to catch on the textured surfaces and highlight them dramatically. It's like giving your art a cheeky little wink, adding dimension and visual appeal that makes it pop.
After you've finished painting, be patient and allow your masterpiece to dry completely—this can take anywhere from 24 to 48 hours, depending on humidity and the thickness of the paint layer.
Once your artwork is dry, you might want to think about framing it with a floating frame. This not only protects your creation but also enhances the presentation, showcasing those delightful textured effects you've worked so hard to create.
In the end, you'll have an eye-catching piece that reflects your unique artistic vision, ready to be admired by all who gaze upon it.
Tips for Displaying Your Artwork

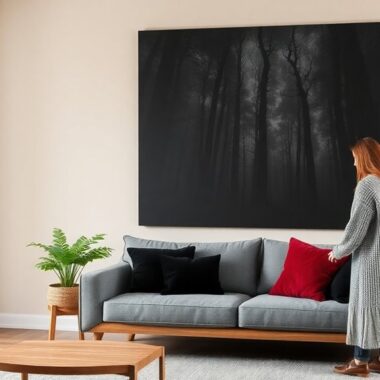
To make the most of your textured canvas art, display it in a well-lit area where the interplay of textures and colors can truly shine. Good lighting serves as a vital element, illuminating the intricate details and enhancing the visual impact that your artwork brings to a space.
When deciding on the perfect spot, think about natural light sources or strategically placed lamps that can highlight the artwork's features without overwhelming them.
Next, make sure you use appropriate hanging hardware that can support the weight of your masterpiece; after all, you wouldn't want your creation to take an unexpected tumble. Securing it with robust anchors will confirm that it remains steadfastly mounted on the wall, providing you peace of mind.
For best viewing, aim to position your artwork at eye level. Doing so allows viewers to appreciate the textures and details up close, engaging them in a more intimate experience.
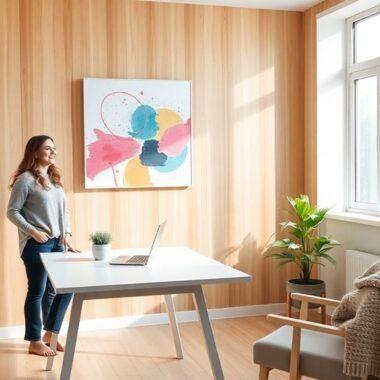
Moreover, consider incorporating complementary decor items around the artwork—think plants that breathe life into the space, or framed photos that create a narrative. This approach not only draws attention but also fosters an inviting atmosphere that encourages admiration.
Lastly, don't forget to maintain your artwork's pristine appearance by dusting it regularly with a soft cloth. This simple yet vital step prevents the accumulation of dirt, guaranteeing that the interesting textures remain visible for everyone to enjoy.
After all, a little upkeep goes a long way in preserving your artistic treasure!
Frequently Asked Questions
What Do You Need to Make Textured Art on Canvas?
To make textured art on canvas, you'll need a blank canvas, joint compound for texture, various tools like putty knives, acrylic paints in your chosen colors, and a clean workspace to create your masterpiece.
What Material Is Used for Texture Painting on Canvas?
What if you could turn a flat canvas into a vibrant landscape? For texture painting, you'll use joint compound or drywall mud. These materials create depth, allowing your creativity to flow freely across the surface.
How Do You Make Texture Paste for Canvas Art?
To make texture paste, mix joint compound with a bit of acrylic paint until it's smooth and spreadable. For extra durability, add drywall mud and Elmer's glue. Experiment with different materials to achieve unique textures.
What Filler to Use for Textured Art?
When you're choosing a filler for textured art, joint compound works great for its smoothness and affordability. You might also consider wall spackle or tile mastic for flexibility, especially if you're worried about cracking.
Final Thoughts
Creating your own textured canvas art isn't just a fun project; it's like opening a secret door to a world where your imagination reigns supreme. By following the steps and techniques outlined, you can transform ordinary materials into extraordinary masterpieces that reflect your unique style. So, gather your tools, let your creativity flow, and before you know it, you'll be the proud owner of art that rivals the greatest galleries!
If you ever find yourself in need of high-quality canvas prints or expert advice on art, look no further than VerVeLush. Our store specializes in offering unique art supplies and stunning canvas options to help bring your creative visions to life. Happy crafting, and may your walls be forever adorned with your beautiful creations and our exquisite pieces!


